
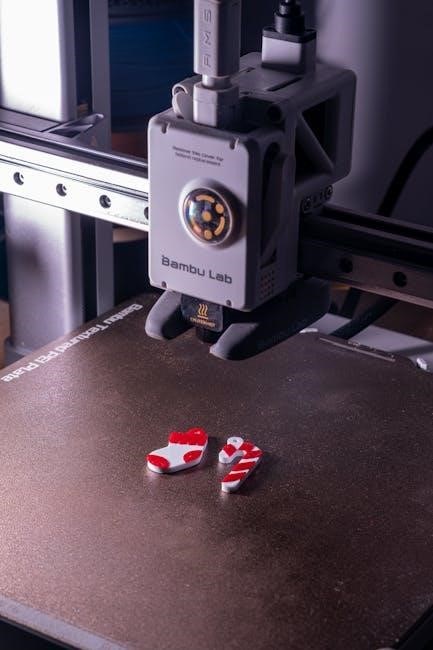
The Bambu Lab P1S arrives ready for immediate use‚ a hallmark of Bambu Labs printers‚ boasting unique upgrades over the P1P model․
What is the Bambu Lab P1S?
The Bambu Lab P1S represents a significant step forward in accessible‚ high-speed 3D printing technology․ It’s designed to offer a premium out-of-the-box experience‚ minimizing setup complexities often associated with hobbyist-grade printers․ Unlike some competitors requiring extensive assembly‚ the P1S comes largely pre-assembled and calibrated‚ allowing users to begin printing almost immediately․
This printer builds upon the foundation of the P1P‚ incorporating enhancements focused on ease of use and print quality․ It’s targeted towards both beginners venturing into the world of 3D printing and experienced makers seeking a reliable and efficient machine․ The P1S aims to bridge the gap between affordability and professional-level performance‚ making advanced features more readily available to a wider audience․
Key Features and Upgrades over the P1P
The Bambu Lab P1S distinguishes itself from the P1P through several key improvements․ Notably‚ the P1S boasts a reduced printer weight‚ contributing to potentially faster acceleration and more precise movements during printing․ A significant upgrade is the inclusion of a fully enclosed chamber‚ enhancing temperature control and enabling successful printing with a wider range of filaments‚ including those prone to warping like ABS․
Furthermore‚ the P1S features improved noise reduction‚ creating a quieter printing environment․ These enhancements collectively elevate the P1S‚ offering a more refined and versatile 3D printing experience compared to its predecessor‚ the P1P‚ while maintaining a similar accessible price point․

Unboxing and Initial Setup
Getting started with your Bambu Lab P1S is straightforward; this guide simplifies complex steps for effortless understanding of your new 3D printing manual․
Package Contents Checklist
Upon unboxing your Bambu Lab P1S‚ carefully verify all components are present․ The standard package includes the P1S 3D printer itself‚ a power cable to get you started‚ and a spool of PLA filament – enough for initial test prints․ You’ll also find a tool kit containing essential Allen wrenches and a spatula for removing prints․
Don’t overlook the documentation! A quick start guide provides immediate setup instructions‚ while a more comprehensive manual details all features․ Additional items may include a USB drive with software and sample models‚ and potentially extra build plate sheets․ Inspect everything for any shipping damage before proceeding․ Keeping the original packaging is advisable for potential warranty claims or returns․
Connecting the P1S: Power and Network
Establishing a stable connection is crucial for seamless operation․ Begin by plugging the provided power cable into the P1S and a grounded outlet․ For network connectivity‚ the P1S supports both Wi-Fi and Ethernet․ Wi-Fi setup is managed through the Bambu Studio software‚ requiring your network name and password․

Alternatively‚ connect an Ethernet cable directly to your router for a more reliable connection․ Once connected‚ the printer will attempt to obtain an IP address automatically․ Verify the connection within Bambu Studio to ensure communication․ A stable network link enables remote monitoring‚ control‚ and over-the-air firmware updates‚ maximizing your printing experience․
First Power-On and Basic Configuration
Upon powering on‚ the P1S initiates a self-test sequence‚ verifying hardware functionality․ The touchscreen interface will guide you through initial setup․ Select your preferred language and region․ Next‚ connect to your Wi-Fi network if you haven’t already via Ethernet․
Bambu Studio will automatically detect the printer․ Follow the on-screen prompts to complete the basic configuration‚ including setting the print bed size and nozzle type․ This initial calibration ensures optimal print quality․ Familiarize yourself with the touchscreen controls for navigating menus and initiating prints․ This effortless setup process gets you printing quickly!

Understanding the P1S Hardware
The P1S features a refined print head‚ a precisely engineered build plate‚ and a robust filament system‚ offering seamless compatibility with the AMS․
Print Head and Nozzle
The P1S print head is a crucial component‚ designed for both speed and precision․ It incorporates a fully enclosed‚ heated print head‚ minimizing warping and ensuring excellent adhesion for a variety of filaments․ The nozzle itself is easily replaceable‚ allowing users to experiment with different materials and print resolutions․
Bambu Lab prioritizes user-friendliness‚ making nozzle swaps straightforward‚ even for beginners․ The print head’s design contributes significantly to the P1S’s ability to handle complex geometries and intricate details․ Maintaining the print head’s cleanliness is vital for optimal performance; regular cleaning prevents clogs and ensures consistent extrusion․ The robust construction of the print head guarantees durability and long-term reliability‚ even with frequent use․
Build Plate and Bed Leveling
The P1S features a flexible‚ magnetically attached build plate‚ simplifying print removal․ This design minimizes the risk of damaging prints during removal and provides a secure adhesion surface during the printing process․ Automatic bed leveling is a standout feature‚ utilizing smart sensors to precisely map the build plate’s surface․

This eliminates the need for manual adjustments‚ ensuring consistent first layers and reducing print failures․ The system compensates for minor imperfections in the build plate‚ guaranteeing optimal print quality․ Maintaining a clean build plate is essential for strong adhesion; wiping it with isopropyl alcohol before each print is recommended․ The P1S’s build plate system contributes significantly to its ease of use and reliable performance․
Filament System and AMS Compatibility
The Bambu Lab P1S supports a wide range of filament types‚ including PLA‚ PETG‚ TPU‚ and ABS‚ offering versatility for various projects․ It’s designed for seamless integration with the Bambu Automatic Material System (AMS)‚ enabling multi-color and multi-material printing capabilities․ The AMS manages multiple filament spools‚ automatically switching between them during prints․
This feature unlocks complex designs and functional prototypes․ While the P1S can operate without the AMS‚ utilizing it significantly expands its creative potential․ Proper filament storage is crucial to prevent moisture absorption‚ which can affect print quality․ The P1S’s filament runout sensor pauses prints if a spool runs empty‚ preventing wasted material and failed prints․

Software and Slicing
Bambu Studio provides a comprehensive interface for controlling the P1S‚ offering model importing‚ slicing profile selection‚ and advanced settings adjustments for optimal results․
Bambu Studio: An Overview
Bambu Studio is the central software hub for operating your Bambu Lab P1S‚ offering a streamlined and intuitive experience for both beginners and experienced users․ This powerful application handles everything from model importing and manipulation to slicing and print job management․ It supports a wide range of 3D model formats‚ ensuring compatibility with your existing designs․
The interface is thoughtfully designed‚ providing clear visual feedback and easy access to essential controls․ You’ll find tools for arranging models on the build plate‚ adjusting print settings‚ and monitoring print progress in real-time․ Bambu Studio also features a growing library of pre-configured slicing profiles optimized for various filaments and print qualities‚ simplifying the setup process․ Furthermore‚ its cloud-based nature allows for seamless synchronization across devices and easy sharing of print jobs․
Importing Models and Slicing Profiles
Importing models into Bambu Studio is straightforward; simply drag and drop your STL‚ OBJ‚ or 3MF files directly into the software․ The application supports multiple model imports‚ allowing you to prepare complex prints with several components simultaneously․ Once imported‚ you can manipulate the models – rotate‚ scale‚ and position them as needed on the virtual build plate․
Slicing profiles are pre-configured sets of parameters that dictate how your model will be translated into instructions for the P1S․ Bambu Studio offers a variety of built-in profiles tailored to different filaments (PLA‚ ABS‚ PETG‚ etc․) and desired print qualities․ You can also create and save custom profiles to fine-tune settings like layer height‚ infill density‚ and print speed‚ optimizing your prints for specific needs and materials․
Advanced Slicing Settings for Optimal Prints
Optimizing print quality requires delving into Bambu Studio’s advanced slicing settings․ Adjusting parameters like wall line count impacts strength and surface finish; higher counts yield more robust‚ smoother prints․ Infill patterns and density control internal structure – gyroid infill offers a good balance of strength and speed․ Experiment with support structures; tree supports minimize material usage and improve surface quality on overhangs․
Temperature control is crucial․ Fine-tune nozzle and bed temperatures based on your filament type for optimal layer adhesion and minimal warping․ Flow rate calibration ensures accurate extrusion‚ preventing over or under-extrusion․ Explore variable layer height settings to prioritize detail in critical areas while maintaining speed elsewhere‚ achieving a balance between quality and print time․

Printing with the P1S
Initiating a print is straightforward; load filament‚ ensure proper bed adhesion‚ and monitor the process via Bambu Studio for seamless operation and control․
Loading and Unloading Filament
Loading filament on the Bambu Lab P1S is a remarkably simple process‚ designed for user convenience․ Begin by navigating to the “Filament” option within the Bambu Studio interface․ Select “Load” and the printer will automatically heat the nozzle to the appropriate temperature for the chosen filament type․
Once heated‚ gently insert the filament into the designated input port until you feel resistance‚ then confirm the loading process through the touchscreen․ The P1S will then automatically feed the filament through the system․
Unloading filament is equally straightforward․ Select “Unload” in Bambu Studio‚ and the printer will retract the filament․ Once cooled‚ you can easily remove the filament from the input port․ Always ensure the filament is fully retracted before attempting removal to prevent jams or damage․
Starting Your First Print
Initiating your first print with the Bambu Lab P1S is a streamlined experience․ After slicing your model in Bambu Studio and transferring the file to the printer – via SD card or Wi-Fi – select the desired print job from the touchscreen interface․
Before commencing‚ verify that the correct filament is loaded and the build plate is clean and properly leveled․ The P1S will then automatically perform a bed mesh calibration to ensure optimal adhesion․
Press the “Print” button‚ and the printer will begin heating up and preparing for the print․ Monitor the initial layers closely to confirm proper adhesion and extrusion․ Enjoy watching your design come to life!
Monitoring and Controlling Prints
Throughout the printing process‚ the Bambu Lab P1S offers comprehensive monitoring and control options․ The touchscreen interface displays real-time information‚ including print progress‚ estimated time remaining‚ nozzle temperature‚ and bed temperature․
You can remotely monitor and control your prints via the Bambu Handy app‚ providing convenience and flexibility․ Adjust print speed‚ pause the print‚ or even cancel it if necessary‚ all from your smartphone․
The integrated camera allows for visual inspection of the print‚ ensuring everything is proceeding as expected․ Utilize these features to maintain optimal print quality and address any potential issues promptly․

Maintenance and Troubleshooting
This section provides valuable insights into troubleshooting common issues with your new Bambu Lab P1S․ Familiarize yourself with regular maintenance tasks for peak performance․
Regular Maintenance Tasks
Maintaining your Bambu Lab P1S ensures consistent print quality and longevity․ Regularly inspect the print head and nozzle for any filament buildup‚ cleaning them with a brass brush or needle․ The build plate should be cleaned with isopropyl alcohol after each print to guarantee optimal adhesion․
Periodically check the belts for tension and wear‚ adjusting or replacing them as needed․ Lubricate the lead screws and linear rails with appropriate grease to maintain smooth movement․ Dust accumulation inside the printer should be removed with compressed air․ Finally‚ ensure all connections are secure and firmware is up-to-date for reliable operation․ Following these steps will keep your P1S running smoothly․
Common Printing Issues and Solutions
Encountering printing problems with your Bambu Lab P1S is common‚ but often easily resolved․ Filament jams can usually be cleared by heating the nozzle and manually pushing filament through․ Poor bed adhesion can be improved by leveling the bed‚ adjusting the Z-offset‚ or using a brim․
Warping can be mitigated with a heated bed and enclosure․ Stringing often indicates excessive temperature or retraction settings‚ requiring adjustment in your slicer․ Layer shifting suggests loose belts or excessive print speed․ Refer to the Bambu Lab documentation for detailed troubleshooting steps and error code explanations to quickly diagnose and fix any printing issues․
Error Codes and Their Meanings
Decoding error codes on your Bambu Lab P1S is crucial for efficient troubleshooting․ A “Nozzle Cold” error indicates the nozzle hasn’t reached the target temperature‚ often due to a faulty heater cartridge or thermistor․ “Bed Leveling Failed” suggests issues with the auto-leveling process‚ requiring bed re-leveling or probe calibration․
“Filament Runout” signals an empty filament spool or sensor malfunction․ Consult the Bambu Lab manual or online resources for a comprehensive list of error codes and their specific solutions․ Understanding these codes empowers you to quickly identify and resolve printing problems‚ minimizing downtime and maximizing print success․